top of page
Week1- Introduction to the unity software

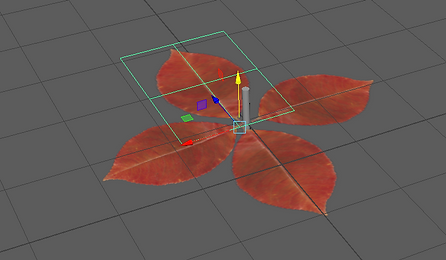
We started off by importing a low poly environment into unity and playing around with different objects so we can understand the basics.
I then used the move tool to place the rock into a different position , and used the colour palette to change its colour.
Rock different position

Flowers green colour


Using prefabs
We used premade objects to create our own environment
I tried to make a symmetrical kind of environment by placing the trees in all corners. Also I added a rock stump with a flower on top contrasting the scene.


W key- move E key - rotate and R key to scale
week 2 : maya scene sculpting

Week 3: using alpha channel textures
week4 :Lighting

week 5- 6: Assignment 1: CGI dimensions of practice
Part 1: real time and pre- rendered lighting
I imported a table asset with a lamp into maya and experiment with the different types of light sources.

The first type of light source I experimented with was an area light .
For the area light to become more effective I had to increase the intensity and exposure


The second type of light source I used was a directional light


part 2 : materials setup procedural environments

I used a moss ground as my asset to texture

I lessened the specular colour to make a dark texture to the moss
Assignment 2: Materials and shading
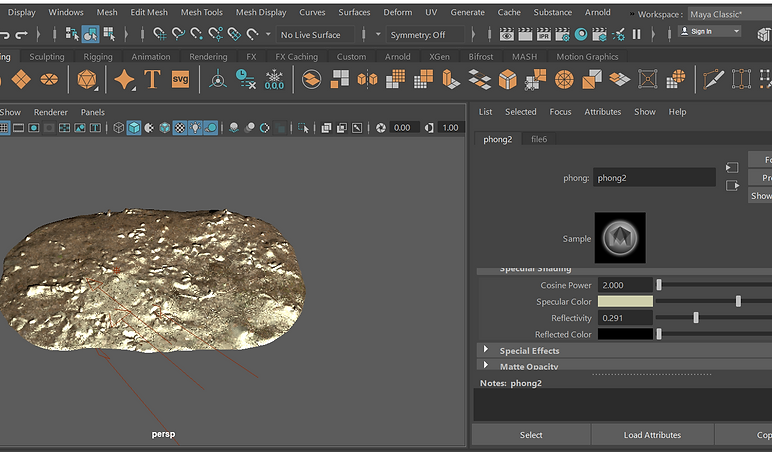
Part 1 texturing an oil barrel
I am using maya as my chosen package to show my textured work on objects and for materials.


I created this base model of an oil barrel and then found this rusty old texture for the barrel. This texture was the right choice as I feel it has a contrast in colours and a number on it foe extra detail.


A new lambert phong was created and I clicked the box next to " colour" and scrolled to file name to select my oil barrel texture. I changed the phong to a sphere so it was easier to see and middle mouse clicked the oil barrel material onto my object in maya so the texture was projected.

The UV editor is what I used next to perfect the texturing mapping of my barrel
. next to the number 75 on the barrel there is a sort of seam line and I wanted to not make as visible , So i resized the uv using the transform tool.
Part 2 texturing the earth in maya
earth Texture map image
Bump map image


Specular map image

Made a small sphere , then clicked on the hypershade and added a blinn material. After I clicked the checkered box next to colour and clicked file to bring the earth texture map image
This video then shows the earth texture being applied and I then add a specular map to fix where the light shows on the sphere.
I then placed a bump map texture onto the earth to make it more realistic. The countries are bumped and more detail is shown.
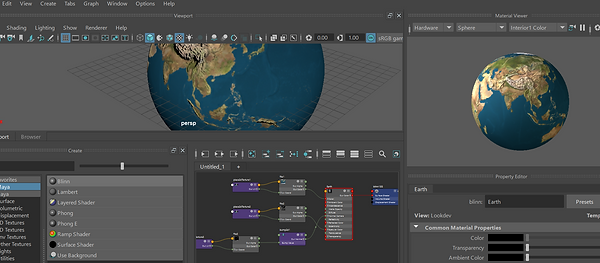


These are the two final images alongside a final rendered image of the earth
Assignment 3 - personal development
Attempt 1
I have decided to improve the lighting and rendering of my desk scene with the lamp as in my first assignment all you could see was purple blue tints and my framing wasn't precise showing the objects clearly
Firstly , I did this by removing the reference geometry and the window I made in the scene and made a physical sky for better/more light to show light.
Upon rendering the desk I noticed the lamp wasn't as visible so I lowered the weight of the base and increased the metalness of it.

when rendering it , I also increased the gamma ray and exposure, thus giving the lamp a more chrome look

Final renders of first attempt


Attempt 2
I then wanted to try rendering different colours properly , so I selected the desk group in the attribute editor and assigned a new material making it a blue colour and the handles purple . I made sure the base weight and sepcular weight were both increased as well as the metalness.

Final render of attempt 2

bottom of page