top of page
Introduction to Mocap/ Maya HIK QuickRig and Retargeting
In this lesson I learnt to create a rig from the skeleton mesh . I downloaded a skeleton fbx model and imported it into maya . Then went to windows animation editors- human IK to bring up the human ik control window. This allowed me to select the quick rig tool for the skeleton


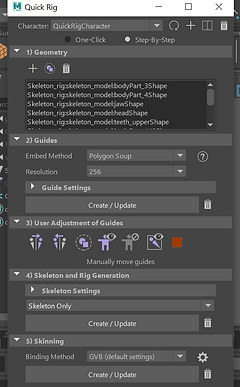
Video on setting up control rig:
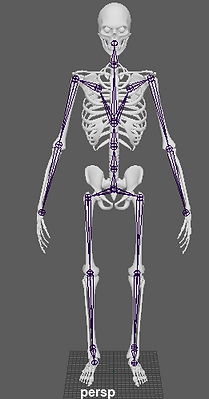
Next I learnt how to retarget motion capture data to our own character's
I downloaded and imported an fbx capture file under ( week 1 - session capture- fbx )

HIK quick Rig customization
In this lesson we learnt how to add fingers to our model , but first i had to setup the quick rig for it . First I downloaded a new rig into maya. went to windows animation editors then quick rig to set it up.
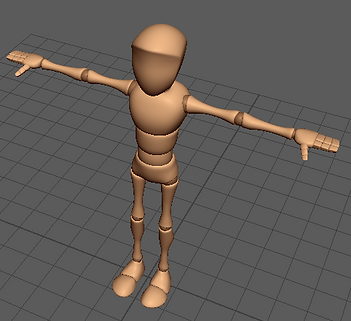
video on making the fingers:
In the second video, I selected the finger joints I made , shift selected the hand joint then pressed p to parent/attach them together. I then went to the definition section on the side and assigned the joints to certain parts of the hand . Afterwards within the quick rig and pressed bind skin to finish off the rig

Maya Time Editor , HIK Character relocation, Maya character Modelling ( tips for assignment 2)
Maya Time Editor:
In this lesson we learnt about the time editor and how to blend motion capture clips together
Imported this animation scene and went to windows , animation editors, then time editors, to bring up time editor.

next i copied the first animation clip
Then trimmed the clips
Finally right clicked on second clip got to relocate match relocators. selected an object in human ik controls then clicked match
Assignment 1 : Motion Capture Setup and Retargetting
I made an account with maximo.com and downloaded the " X BOT" character rig.
Then I went to file>import in maya an opened the "X Bot" fbx file.
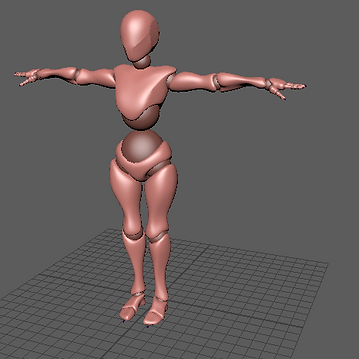
Mo cap setup:
Firstly, I went to windows>animation editor>humanik, to bring up the quick rig tool. After pressing create/update I got the guides for the character .
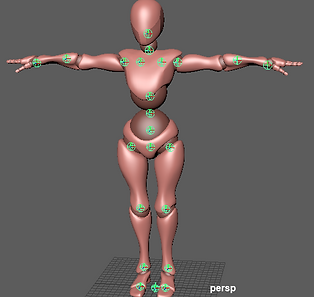
Then moved the guides in the correct position. clicked display>animation>joint size to bring the joint size down.

Retargetting mocap data onto character:
Lighting scene and rendering it
Went to show in the viewport and turned off joints so just the character model can be seen
Next I used these videos to help with the lighting of my character.
Final Assignment 1 Render:
Assignment 2: Robot animation with indoor setting
Part 1: Creating environment
I made the chairs for my scene I went to (create, curve tool, Epcurve tool) . Went to the curves and surfaces tab and clicked loft to put geometry together. Then went to modify, convert, nurbs to polygons options making sure control points were selected then tesselate.
Next I pressed (Ctrl and E) to bring up the extrude tool and moved it forward to create the geometry thickness. I then pressed 3 to smooth it out . Finally clicked (mesh display , reverse) to bring the grey colour back.

Now I added the table by going to poly plane , going to face mode and deleting the middle faces. then i pressed ctrl e and extruded it upwards. Next I made the walls and added a polytorus underneath the chairs as floating stands
Right clicked went to face mode and selected the floor. Right clicked went to assign new material , lambert and clicked the box next to colour and imported the file. pressed 6 on keyboard to view texture
made a lamp in the back and using a poly cylinder for the base , and poly pipe for lamp shade then, I put a spotlight underneath . I set the intensity to 8.

Then I used a poly plane to make the roof of the room then I added a point light moving it to the roof , making sure the point lights intensiy was at 2000

I then created a poly cube on the wall. After that I assigned a new material to it and added an image. Then I had to UV map the image by going to (modelling tab and went to uv > uv editor)
Then I selected the picture and went to UV in the workspace. Clicked on automatic, to place the picture correctly

Part 2 : creating animation sequence
Firstly, I went to file import and chose the fbx file and then i put the mocap data in a tpose and retargetted the data
Next I renamed the character to (Mocap _Data)
Then i opened the time editor ( windows, animation editor, time editor)and in the time editor I then clicked import content to bring in my desired fbx files
I exited the time editor I clicked file and I imported only the quick rig skeleton of my model, then changed the character to xbot quick rig and source to Mocap data as seen below.


Finally , I put the clips together . I overlapped the first two mocap clips together and then right clicked on the second clip and went to (Relocate>match relocators).
Then I selected the left foot of the mocap data, clicked the icon with the blue marker and brought the slider to the middle , where it overlaps. then i clicked match
I then did the same for the third and fourth clip
Finally I used the middle mouse button to zoom in to see all my animation clips.
part 3: Time sequencer in maya
I imported my environment scene into the animation scene and put my perspective camera into position. then i pressed ctrl and e to extrude the walls.

Next I went to create , camera, which made cam 1. I then went to panels in the viewport and selected cam 1 , and changed its position.
Then created another the camera to make cam 2 and keyed the camera
finally, I went to windows animation editors camera sequencer. then i clicked create shots and chose each of the cameras.
Finally i clicked create then ubercam in the time sequence editor so i can render all clips from one camera. After wards I clicked panels,perspective,ubercam
Then I clicked panels , perspective then uber cam to select the camera
Before i rendered my scene i made sure both the exposure and intensity of my lights were ahigh value
Final playblast video of animation sequence
bottom of page