top of page
Rigging Overview : Tentacle
creating tentacle method:
part 1: Creating tentacle
-
select poly cube , in attribute editor select polycube1 : (Height and subdivison height value- 10) , (subdivision width- 2) . Then preview top view select vertices with shift and press 3 to smooth model. View wire frame view
Part 2: Making joint chain for model
-
view front view . Then select rigging tab in corner . Go to skeleton - create joints. Making sure primary axis is at x, hold x on keyboard and click to make joints
(Part 1 and 2 video below )

Part 3 : Attatching joint chain to model ( Video below)
-
In the Outliner I selected pcube 1 , then shift selected joint 1
-
Selected skin tab at top then selected bind skin option box in drop down menu. clicked edit the reset settings, then clicked bind skin at bottom.


Joint creation : Robot

To start off I changed the modelling tab to the rigging tab and went to skeleton > create joint. I held down X on the keyboard and clicked on the grid .
Next I created the joint for the legs and repeated the same process for the spine
Now I had to mirror the joints on the other side . I selected the model and pressed 4 on the keyboard to bring up the wireframe view, then went to show tab and turned off polygons.
To connect the joints together for the legs I selected the right /left leg on the joint , shift selected the spine joint and pressed p to connect them together and vice versa for the arms
Finally I parented the arm and the spine so it can all move together . first i brought up the wire frame view by selecting my model and pressing 4 so i can see more clearly. Then I selected the shoulder sphere then shift selected the shoulder joint then pressed p to parent
The last thing to parent together, were the legs with the body
Skinning- Arm
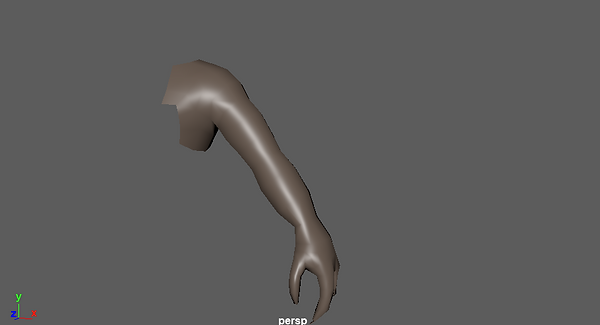
Went to rigging tab , clicked on skeleton then create joints . clicked reset tool and changed shortbone radius and long bone radius to 1
deleted the fourth joint I made and renamed the arm joints
I then repeated this process to make the joints for the thumb , index finger and little finger joint and then renamed the joints in the outliner
Thumb:

Index finger:

Little finger:

Now I connected all the joints together. to connect joints together, I selected a finger joint first , then shift selected the arm joint , then pressed p to parent it.
I then animated the arm. whilst in the rigging tab, I selected the arm joint, then shift selected the arm mesh , the went to skin bind skin
Finally I will use the weight paints to refine the hand movement
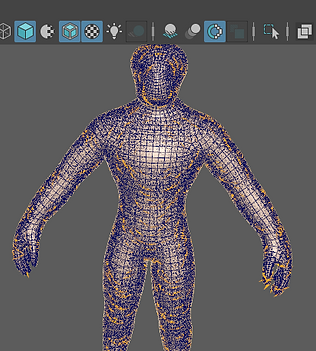
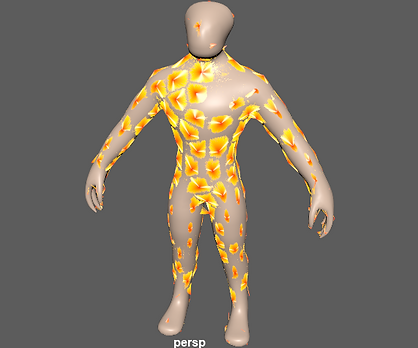
Paint weight part 1:
-
I selected the arm mesh in the outliner. I then right clicked and went to paint weight tools.
-
After this I clicked JT_ROOT_01 then scrolled down and clicked flood.
-
In the time on the first box Iput the value 320
Paint weight part 2:
-
I locked everything except for JT_ROOT_01 AND JT_L_SHOULDER_01
-
Went to select mode in the paint tools box, right clicked then went to vertex and selected a vertex point. shift clicked another vertex point on same line.
-
Ctrl and left click, went to grow then grow selection. afterwards pressed G on keyboard to move selection up , and went back to paint mode. Now the paint weight area is visible.
The lighter the area is( more paint weight- white colour), the more the area moves

Assignment 1: Mechanical rig
Version 1:
Firstly, I made this model , then I grouped the items all together by selecting all of the shapes in the outliner and pressing ctrl g
Next I did the joints for the arms and the legs.
Next I did the joints for the spine. and then mirriored the joints
Finally I parented the mesh together
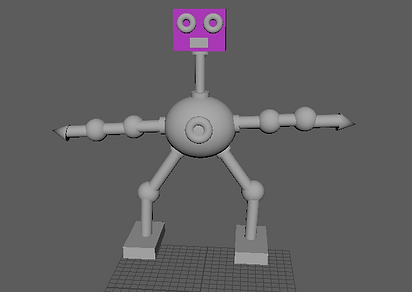
Version 2: improved version
I made a second version , so I could parent my joints to the mesh properly and I also wanted my model to move more, so I added more shapes to my model

I created the arm joints and parented them the same as before .
I then did spine joints on the new model . To do the spine joints I pressed spacebar then went to the front view.

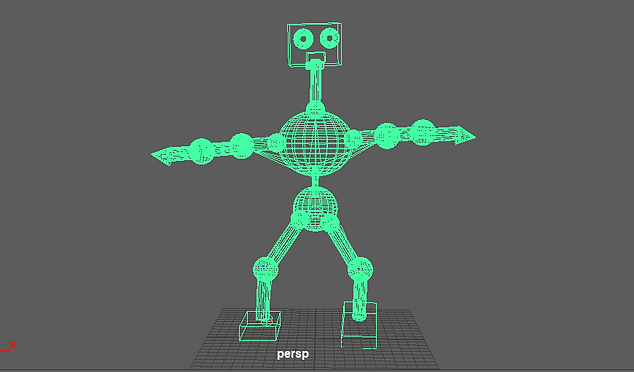
I then did the joints for the legs then mirrored the joints. Afterwards I parented the leg ,spine joints and extra arm parts with the mesh . The head was parented the same in version 1
After everything was parented it looked like this
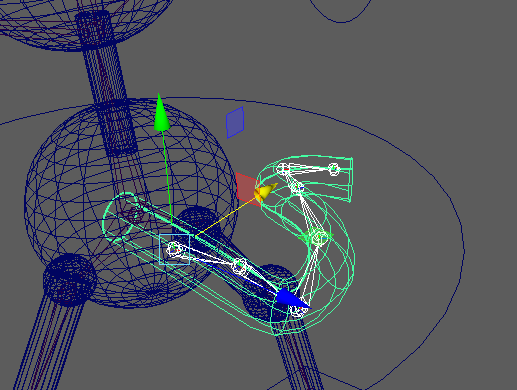
I added a root control to my model to make it move easily around the scene . To start the root control I went to curves and surfaces in the menu and selected Nurbe Circles.

I also added an arm IK control
Final animation and render:
Mash Networks Mocap
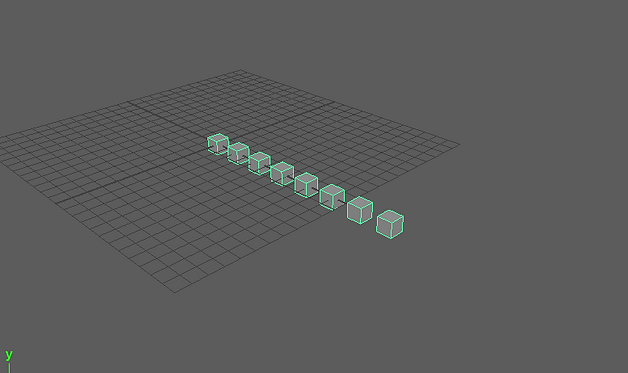
next I created an animation for the cubes

Then I changed the formation of the cubes
Finally added colour to the model
Fur:
We learnt how to attach fur to our characters using XGEN.
Firstly, I changed the worskpace to Xgen interactive groom editor in the top right

Next I went to create, intercative groom splines and set these settings, then clicked create

Afterwards I incresed the denisty multiplier to give more fur
I then density masked the model to remove the fur from the head hands and feet. I then pressed w to come out of paint mode and pressed h on inguide in the outliner to hide the guides at the end
Next I added guides to the model
To put less fur on the model i went to the alien fur base and decreased the density multiplier and mask value under generator
Then groomed the fur
Finally i clumped the model
to change the hair colour of the model i clicked the top (alien base) in the groom editor and went to hair physical shader in attribute editor
Assignment 2 organic rig:
I used my first assignment to create tentacles on my model with fur then rendered it out
Creating the tentacle:
Next i rigged the tentacle , then created another one with a joint chain
adding the fur :
Firstly, I changed the maya workspace to interactive groom editor
Then went to create, interactive groom splines and set these settings , then clicked create.

Next i made a clump of the fur
In the clump settings I changed the flatness offset and curl to get this look

Final render :
bottom of page