top of page
Week1 - photoshop intro


Our first introduction to photoshop was by creating this stormy sky behind the famous stonehenge.
week 2- green screen and photoshop brushes


To make a sky appear behind a woman photoshop was used, to combine the two separate images.
I created this rusty building with vines in Photoshop. I learnt about adding layers and using different types of brushes to make certain effects.I also learnt how to add a lens flare in the background for extra effect. A horror film like setting is created here as the stormy sky overlaps the broken down rusty building.


week 3 fake news and introduction to Maya

Within Maya I created my own spaceship, starting with a simple design of the tail and two wings. the video on the right shows how I attempted to make the spaceship, using techniques such as combining vertices to correct the image and smoothing the model out for a cleaner finish.
Fake news: Pregnant woman gives birth to alien baby

How I made my fake news photoshop image:
-
I clicked the select all tab on the alien baby picture
-
Clicked edit tab then copy on baby pic
-
selected the pregnant woman(background) and pasted the alien baby onto it
-
resized the alien pic to fit size of background
-
Then pressed select on layer 1 (baby alien), then clicked colour range
-
I clicked the plus button to make the background white and the subject was black.
-
Ticked the invert box
-
Scrolled to the bottom and clicked the button next to the fx button to blend the images together.
-
To resize the alien image I clicked the exact layer, then I pressed Crtl+T to resize it to make it fit within the pregnant ladies belly
week 4- maya modelling techniques
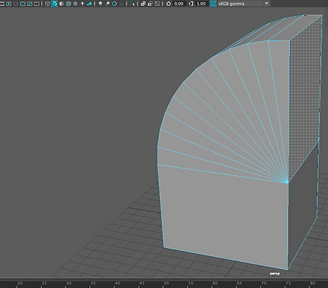
Using certain techniques I modelled my own kettle in Maya

Week 5- Maya modelling techniques
Boolean modelling technique:

wedge face technique :

lattice deformer technique:

Week 8- Assignment 1 digital mini challenges part 1-bond gadget hand in
Bond gadget( chair with lasers )


I made the chair by selecting the poly cube and transforming and rotating it to form arms and supports. The legs of the chair was made by selecting the poly cylinder and pressing ctrl+d to duplicate them on each side.
How I made the gun part 1 :
How I made the gun part 2:
How I made the cushion:
Assignment 2 - digital mini challenges part 2.
New York rooftops challenge
Reference image:

I chose this reference image for my New York rooftop because there's a lot of detail within the scene. The back wall has a nice layer of dark glass with bars attached to it , a tall pillar beside the window as well as well designed pool in the middle. There are also well aligned and colourful chairs around the swimming pool.


I Firstly , started off by selecting the poly cube modelling at the top and transformed and moved them so that one was lower than the other. I also made a small rectangular shape to create a border for the chairs, aswell as the glass window and swimming pool. I assigned a new material to the window then selected ai standard surface shader, then glass material so that the glass would show in the render.


I decided to add different textures of bricks to the rooftop such as a grey marble one and light beige wood texture to contrast each other. I then added my own spiral staircase , connecting to the upper rooftop to make it look more realistic. Also added cloth texture using ai standard surface shader to colour the chairs.

How I made the spiral staircase :
How I made the chairs :
Texture tutorial for my building :
Time shift challenge
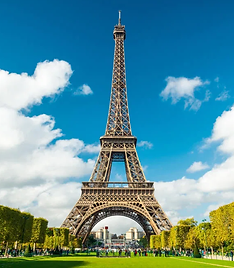
Our next challenge was to create a time shift . For my time shift assignment I decided to create a time in the future with two Eiffel towers near each other, spaceships flying around them and a city below.
Reference images :


I started off by first creating the city of the time shift, making sure to extrude some of the cube faces at the end so they becomes skyscrapers.
How I made the city :

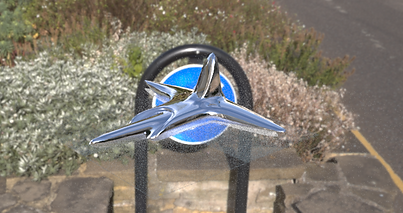
Secondly, I created the spaceship and elongated the arms and the tail to give more a defined look aswell as adding a chrome material to it.

Finally, placing the Eiffel towers, city and ships in the air , I rendered out the model with my sky dome for the final image .
Eiffel tower creation :


bottom of page